Thursday, June 26, 2008

Off the Subject: Brisket

I'm going to stray from the usual topic today. This weekend I had a chance to buy brisket at 99 cents a pound at the local Super Target. I thought I would try to smoke a Brisket now that I have a back yard now and a new vertical water smoker from Brinkman ($59 Home Deopt). This is my way of multi-tasking; make a bookcase while roasting a rack of rib.

To get a moist and tender brisket, the tough cut of meat is slowly heated to about 190 degrees internal temperature. This slow and steady process breaks down the tough muscle and its' membrane and turns it into tender juicy meat. The formula is 1.5 hours per pound at about 220 degrees. This adds up to about 15 hours of smoking for a 10 lbs brisket to hit perfection. It’s hard to dedicate this amount of time for the average person, so I’ll use some time management to get good result without spending 15 hours babysitting a brisket.

  1. The meat is probably the most important part of the process. Buy a smaller 8 pounds brisket and cooking time gets cut down to 12 hours. This is much more manageable than the larger sizes as it fits in the smoker with enough room for the smoke to surround it. Find a brisket with good marbling of fat and meat. Since this is hard to see through the plastic vacuum packs, pick a piece that is soft and bendable. Meat with higher fat marbling bends and flexes more than leaner cuts.
  2. Preparation; leave the brisket out all day to reach room temperature. Smoking a refridgerated cold brisket slows the process down tremendously. Some people also advise s you to marinade it in a slight acidic bath to break down the protein. Ignore it since heating it correctly will do the job. Half hour before it goes into the smoker, rub the meat with BBQ spice rub. I make my own rub with salt, pepper, paprika, cayenne peppers, sugar and MSG. Putting the rub on too long will it dry out the meat. Don't be afraid to put a lot on, most will fall off or burn off. I don't use fancy herbs and spices, the prolonged heating session will often neutralize any herbal flavor. Some people tells you to trim the fat cap to 3/8 of an inch thick. I Leave the fat on, I just cut slashes in the fat cap and force some of the rub in there as well.
  3. Heat the meat. This depends on what type of heating system you use, I use to throw it in the oven at 225 degrees for 12 hours and then drain the fat dripping occasionally. I now have a vertical water smoker that works well. Hot charcoal briquettes are put on the bottom pan along with wet hardwood chips to produce the heat and smoke. A water pan is place between the meat and the fire to block the direct heat and the water keeps the temperature below 212 degrees, it's so simple.
  4. Maintaining the heat is the hardest part for the charcoal user. It is hard to control the heat by adjusting the vents, and the change in temperature would need a half hour before it can be registered by the thermometer. So I would have to rely on experience to judge the temperature change. I think the flavor is best with charcoal and hardwood so I am willing to put in the effort. I do have to modify the Brinkman smoker. I am having problem with the ashes smothering the coals as it burns in the coal bin. The goal is to maintain a constant heat throughout the session with minimal effort. I think a coal grate would work so that ashes would fall away from the red glowing coals.
  5. Simpify. Keep adding coal and wood chunks or chips for the first six hours, replenish the water and try not to open the smoker door too often. This cools everything down and slows down the cooking session. If I started the smoking process at 6pm, and trust my ability to make a fire that stays lit by giving it just enough air and fuel, then at midnight, the outside of the brisket would’ve turned black from the smoking. This is not burnt as the blackness is actually a very thin layer, the red smoke ring follows, this is a physical sign that smoke had penetrated the meat and is filled with this unique flavor. I would then take the brisket and place it in a preheated oven at 210 - 225 degrees. The oven will maintain the constant heat needed while I get some sleep. I will wake up to an amazing smell in the kitchen and moist and tender brisket.
  6. Leave the brisket out for a hour to cool, slice some across the grain thinly and have some for breakfast. Then wrap the remainder tightly in plastic wrap to keep the moisture. This can stay out for the afternoon BBQ.

Friday, June 13, 2008

Bookshelves by Myself

This bookcase has been sitting quietly in the corner of the Condo for the last five years doing its' duty. Filled with books, it's just another bookshelf. But when we moved, I had a chance to show off it's glory. The back panel is a book matched piece of birch I was lucky enough to find at Home Depot. After visually inspecting about seven 4 x 8 sheets of 1/4 plywood, I managed to find a piece I really liked. I'm not one to waste wood, but to get the heartwood flame shaped pattern centered, it was worth cutting out the unwanted parts.

This is the first project I built with my biscuit joiner, this was five years ago, when I swore the biscuit joiner was the greatest invention ever for cabinet building. I then realized it has it's strength and it's limitations. I didn't use much of it since because the joiner needs a very flat work surface to be precise, something i didn't have in the condo with poorl;. I'll revisit the tool now that I have a garage with a large flat floor.

I didn’t have a circular saw back then, so I had the people at the big box store rip the plywoods down to 11-1/4” pieces so I can fit in the back of my hatchback. I tried to use every piece of wood. This is biggest size bookshelf I can make from a sheet of4×8’ -3/4” birch and a one 1/4” birch. Stock inside corner molding and 1×2 made up the trims. Little legs gives is a nice furniture feel. Unfortunately I think it looks better without books covering up the back panel.

Wednesday, June 11, 2008

Well, This Changes Everything

I'm finally returning to my blog after a long break. We've been busy bonding with San San, a German Shepherd that joined the family in March '08. This requires a house and a yard and a Home owner association that doesn't frown upon 65 lbs dogs, nor tenants who does woodworking in the living room.

Things are finally coming together in our new place. We moved to our new house in February 08 and had been working hard to get to the point where I can start on my workshop. I'm hoping lots of new projects and ideas will come out of this house and workshop.

I swore to myself that would always appreciate this new workshop and never complain about not having enough space as the place starts filling up with things I just can't live without. I'm hoping the luxury of having more space doesn't change my philosophy that as a hobby I can work on my technique instead of relying on dedicated machines.

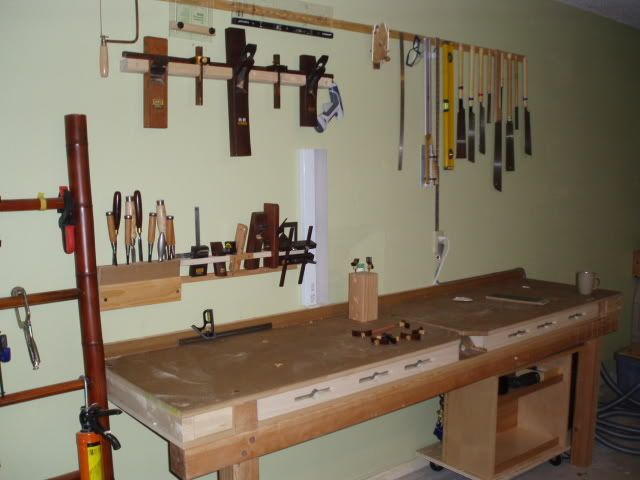
Here’s the result from several weekends of work. Finally a real workbench for this woodworker. Fresh paint went on the walls after I removed the existing shelving nailed onto the walls twenty years ago. This color is the result of me mixing all the paint the previous owner had left behind into a 5 gallon bucket. Luckily my wife is happy with this color, she likes happy shades of green. We park her car on the other half of this garage, so a happy color is important to come home to after a long day’s work, it also neutralizes the mess I’m going to make.

I will get deeper into the construction of the shop on later post.

Friday, December 14, 2007

My Idea, One Hundred Years Late.

Audrey is from Oklahoma, slender, gray haired and bearded, looks to be in his 80's. He is in fact barely 60 but his life experience added years to his look. We were having lunch, his usual hard candies and cigarettes and me, a burger with a helping of second hand smoke.

I told him I had this great idea about gluing cork boards on the floor of my kitchen. I got the idea because the insert of my handcrafted shoes were made of cork and it’s great on my feet all day. It's supportive yet cushiony. The cork boards self-repairs after you put a pin in it. It doesn't rot from water because that’s why they use it to cork wine bottles and it must be acid resistant because wine doesn't dissolve it. So it should handle all the abuse of the kitchen.

Audrey lit up another cigarette and spent the next 20 minutes going into detail about the proper care of cork flooring because they were using the stuff since the turn of the century. I'm talking about the 1900s. It just needed to be stripped and wax once a year. Then Linoleum was the big thing, then no wax vinyl took over and that was the death of resilient flooring. Residential use of cork was dead for decades as housewives and husbands forgotten how to wax a floor.

I think I'm born too late. I looked up cork flooring on the Internet and it's huge with the green movement. Hypo-allergenic, fire retardant, natural insulation, self sealing, good for your joints, all this and it's good for the environment. All this from a tree!

So I made my own cork flooring, 99 cents cork boards, glued to the slab with resilient flooring glue, four or five coats of polyurethane and two coats of wax. The first two pictures shows my homemade cork flooring, the third picture is the manufactured floating I was able to special order from Lowes for about $3.50 a sf. I put it all over the upstairs and lined the stairs with it. I didn't know how to make stair nosing out of cork, so Pine casing will have to do. The contrast is great when you are walking down stairs at night, you can make out the steps.

Monday, December 10, 2007

Finding the Middle Path

Recently, I got this interest for a Festool ROTEX, a $460 sander/polish that hooks up to the vacuum. I did research and found a comparable machine from Bosch for $260. I justified that spending this would make me a better woodworker because sanding is much easier and quicker and a lot healthier since it is dustless, at least that's what I got from the promotional video. Then I summed up the additional expense of all the extra accessories that is needed to make the system useful. I would need extra abrasive disk, pads, vacuum attachments, a place to store all of this. This added up the price and the little tool that would help me do the job turned into a burden. I would have to use this a lot, or it would have to improve my skills by a tremendous amount to justify the purchase. I thought about how I had made the rest of my projects without a sander and realized that my smoothing plane and my two cabinet scrapers and a $2 sanding block were all I ever needed. Desire is a powerful force to deal with. My desire to be a better woodworker, created a desire to get sander. This path would lead me to a large shop filled with tools I cannot master, and that would be a waste. Now, on the other end of the stick, depriving myself of good tools will leave me in frustration as I push wood with a dull chisel. I’m quite sure that mastering the cabinet scraper and the hand plane is the next logical step. So no new tools for me. Is this way of thinking, the path to better woodworking?

Thursday, December 6, 2007

Work Bench by IKEA

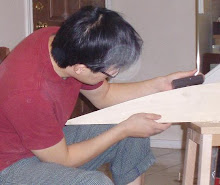
One reason I am able to build furnitures the size of a bed in such a small space is that I don't have a traditional a work bench. I use the floor, or anything that can support a plank of wood, even the project itself. To get the job done, I either clamp it, hold it with my hands and feet or, sit on it . This is possible because I don't mind working close to the floor, and my tools are murderously sharp. Sometimes, I find that getting the work to eye level makes for much more precise and comfortable work, so I found the perfect workbench while getting ideas at a local retailer.

For $9.99 this item from IKEA is the best workbench/saw horse I can buy for the money. They call it Bekvam. It is made of solid European beech held together with confirmat screws and bridle joints. This proves to be sturdy enough for sawing, chopping mortises, or as you can see from earlier picture, larger carving items. The hand grip hole in the middle provides the perfect size to stick the head of the bar clamp in to act as a hold down. It’s a plus when there’s one less thing to buy.

I can sit next to it to do delicate work, or get right on top of it and get some pressure on the wood for aggressive stock removal with my jack pane. Creative use of clamps helps holds the work down, and more recently, my hot melt glue gun.

When it's not on duty, as a workbench, it’s a stepladder to reach the pantry’s top shelf.

Monday, December 3, 2007

The Day Bed

I logged 24 hours to make this day bed. I initiated the project on November 22nd and by December 2nd it was in it's new home upstairs. My wife and I are happy with the result, considering I made up the plans as production progressed. This design on the fly accounted for many hours of my leisurely work pace, stepping back, drinking hot tea, while trying to figure out the next set of moves (which I logged as worked hours). The bed met all of it's requirement. It has a soft light look, with just enough curves, not so much that it looked country. It can be taken apart and assembled in minutes, it is strong, and has a rational portion of exposed joinery and screws. The exposed joinery is my way of showing off my ability and the hidden screws are for quick assembly. Good skill isn't just about cutting that perfect dovetail, it also has to do with getting a quality project completed quickly with relatively little resources. Throughout the project, very little wood was wasted. Even when I made a mistake, the results were accepted and worked into the design. Case in point is the four contrasting dowels at the front legs. I had drilled the holes on the wrong side, so I got some darker wood dowels and make it a through dowel instead of blind dowels. If I should ever have to build another on of these, the result would be different since I learned to avoid certain mistakes, but then I would probably make different mistakes. Last step is to put a several coats of fast drying, hypo allergenic shellac on it.