Before I got into cabinetry and woodworking, I was selling flooring. The quest to understand woodflooring got me into woodworking and so it goes. My other specialty aside from carpets is tiles. So The project for this week is a floating granite tile countertop.
Granite tiles are 18" x 18" batic brown granite I purchased from work at the employee price of $2.22 psf. The wood deck is 24" x 96" piece of birch plywood. That is then ripped to 18" depth x 77-1/2. this fits the wall at my brother's with the 1.5" worth of edge treatment I plan to add with oak. The remainder of the plywood turns into the cleat on the wall to hold the countertop up and the angle support to hold up the deck.

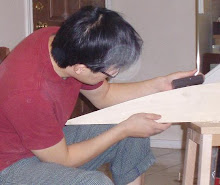
I got the jig saw out this time to get some curves into the work. I thought the bar could use a little more details since it will pretty much a big feature in the room. The two angle supports are cut from the left over square piece of plywood. The curves are hand drawn with my elbow acting as an anchor point and the pencil makes and arch and cut freehand with the jigsaw. I figured I could draw a decent arch, it saves time and no one will look that close and judge how perfect the arch is. The only time things need to be perfect is when one has to fit inside another as a lide or joint or a door. Anything else, is not worth the trouble. The first is a template for the second arch, again, close enough is good enough, sharp new blade and a variable speed Metabo jigsaw minmized the tearouts during the cross cuts.
In order for the granite to adhere to the decking, I had to put on some hardibacker. This is
screwed onto the plywood. The chinese made birch plywood is pretty poorly made. Though plywood is pretty stable when it comes to expansion, the problem is that the tiles is only as strong as the glue that holds the pieces of wood together. The hardiback gives a very good substrate for the mortar to hold the tiles to, and the 30 odd screws holds the substrate to the plywood deck. Expansion, and deflection has been dealt with.
Before the tiles can be glued on, I had to put an oak edgeband on it and then route the profile on it with the router and the viarablespeed router control I talked about last week. This makes the profile of the edgeband align perfectly. I left the edgeband proud of the tiles, leaving just enough space for the thinset so left the tile up a tad. So as it stands this is what the project looked like after five hours of work in the shop and one hour of installation at the site. Next step is to take the cap for the bar. But that would have to wait as I have two more projects to attend to.


