Friday, December 14, 2007

My Idea, One Hundred Years Late.

Audrey is from Oklahoma, slender, gray haired and bearded, looks to be in his 80's. He is in fact barely 60 but his life experience added years to his look. We were having lunch, his usual hard candies and cigarettes and me, a burger with a helping of second hand smoke.

I told him I had this great idea about gluing cork boards on the floor of my kitchen. I got the idea because the insert of my handcrafted shoes were made of cork and it’s great on my feet all day. It's supportive yet cushiony. The cork boards self-repairs after you put a pin in it. It doesn't rot from water because that’s why they use it to cork wine bottles and it must be acid resistant because wine doesn't dissolve it. So it should handle all the abuse of the kitchen.

Audrey lit up another cigarette and spent the next 20 minutes going into detail about the proper care of cork flooring because they were using the stuff since the turn of the century. I'm talking about the 1900s. It just needed to be stripped and wax once a year. Then Linoleum was the big thing, then no wax vinyl took over and that was the death of resilient flooring. Residential use of cork was dead for decades as housewives and husbands forgotten how to wax a floor.

I think I'm born too late. I looked up cork flooring on the Internet and it's huge with the green movement. Hypo-allergenic, fire retardant, natural insulation, self sealing, good for your joints, all this and it's good for the environment. All this from a tree!

So I made my own cork flooring, 99 cents cork boards, glued to the slab with resilient flooring glue, four or five coats of polyurethane and two coats of wax. The first two pictures shows my homemade cork flooring, the third picture is the manufactured floating I was able to special order from Lowes for about $3.50 a sf. I put it all over the upstairs and lined the stairs with it. I didn't know how to make stair nosing out of cork, so Pine casing will have to do. The contrast is great when you are walking down stairs at night, you can make out the steps.

Monday, December 10, 2007

Finding the Middle Path

Recently, I got this interest for a Festool ROTEX, a $460 sander/polish that hooks up to the vacuum. I did research and found a comparable machine from Bosch for $260. I justified that spending this would make me a better woodworker because sanding is much easier and quicker and a lot healthier since it is dustless, at least that's what I got from the promotional video. Then I summed up the additional expense of all the extra accessories that is needed to make the system useful. I would need extra abrasive disk, pads, vacuum attachments, a place to store all of this. This added up the price and the little tool that would help me do the job turned into a burden. I would have to use this a lot, or it would have to improve my skills by a tremendous amount to justify the purchase. I thought about how I had made the rest of my projects without a sander and realized that my smoothing plane and my two cabinet scrapers and a $2 sanding block were all I ever needed. Desire is a powerful force to deal with. My desire to be a better woodworker, created a desire to get sander. This path would lead me to a large shop filled with tools I cannot master, and that would be a waste. Now, on the other end of the stick, depriving myself of good tools will leave me in frustration as I push wood with a dull chisel. I’m quite sure that mastering the cabinet scraper and the hand plane is the next logical step. So no new tools for me. Is this way of thinking, the path to better woodworking?

Thursday, December 6, 2007

Work Bench by IKEA

One reason I am able to build furnitures the size of a bed in such a small space is that I don't have a traditional a work bench. I use the floor, or anything that can support a plank of wood, even the project itself. To get the job done, I either clamp it, hold it with my hands and feet or, sit on it . This is possible because I don't mind working close to the floor, and my tools are murderously sharp. Sometimes, I find that getting the work to eye level makes for much more precise and comfortable work, so I found the perfect workbench while getting ideas at a local retailer.

For $9.99 this item from IKEA is the best workbench/saw horse I can buy for the money. They call it Bekvam. It is made of solid European beech held together with confirmat screws and bridle joints. This proves to be sturdy enough for sawing, chopping mortises, or as you can see from earlier picture, larger carving items. The hand grip hole in the middle provides the perfect size to stick the head of the bar clamp in to act as a hold down. It’s a plus when there’s one less thing to buy.

I can sit next to it to do delicate work, or get right on top of it and get some pressure on the wood for aggressive stock removal with my jack pane. Creative use of clamps helps holds the work down, and more recently, my hot melt glue gun.

When it's not on duty, as a workbench, it’s a stepladder to reach the pantry’s top shelf.

Monday, December 3, 2007

The Day Bed

I logged 24 hours to make this day bed. I initiated the project on November 22nd and by December 2nd it was in it's new home upstairs. My wife and I are happy with the result, considering I made up the plans as production progressed. This design on the fly accounted for many hours of my leisurely work pace, stepping back, drinking hot tea, while trying to figure out the next set of moves (which I logged as worked hours). The bed met all of it's requirement. It has a soft light look, with just enough curves, not so much that it looked country. It can be taken apart and assembled in minutes, it is strong, and has a rational portion of exposed joinery and screws. The exposed joinery is my way of showing off my ability and the hidden screws are for quick assembly. Good skill isn't just about cutting that perfect dovetail, it also has to do with getting a quality project completed quickly with relatively little resources. Throughout the project, very little wood was wasted. Even when I made a mistake, the results were accepted and worked into the design. Case in point is the four contrasting dowels at the front legs. I had drilled the holes on the wrong side, so I got some darker wood dowels and make it a through dowel instead of blind dowels. If I should ever have to build another on of these, the result would be different since I learned to avoid certain mistakes, but then I would probably make different mistakes. Last step is to put a several coats of fast drying, hypo allergenic shellac on it.

Wednesday, November 28, 2007

Head Games

The headboard of the Daybed will be made from this piece of poplar I found at Lowes Lowes'. It as a nice big streak of heartwood going through it's entire length. I try to pay attention of grain pattern whenever I do woodworking because only custom made pieces get this treatment. Manufactured pieces are produced at such a fast rate, the process allows no time to consider grain orientation. I like that wild streak of heart wood through the largest part of the bed. Some woodworker say the grain pattern is the soul of the tree. I can respect that, something did moved me to put it there. The darker heartwood of poplar is usually green, this turns many people away from poplar as a serious wood. Most woodworkers use poplar as hidden sec0ndary wood or paint it. However, the green will oxidize to a nice brown if you leave it out in the sun for a couple hours. The tannins in wood is affected by sunlight, we'll talk about this in future posts.

The headboard of the proved to be the biggest challenge of the project. I had to make a large arch on top of the board. This six foot radius was easy enough to draw using my old fashion folding rule as radius, clamped on the fixed end and a pencil draws the partial circumference which is the arch. Cutting it was harder because I didn’t have a bandsaw nor a jig saw. The thought of using the router didn’t appeal to me because I don't like my router. So I cut it straight at the tangents and then hand plane the rest into a smooth radius. The arch is glued to the bottom piece with biscuit, glue and clamps after I jointed the mating pieces so the two pieces will glue tight. The next difficulty is to attach this large piece of solid wood to the back of the bed in a tasteful method, making sure it can be knocked down, yet remains strong enough to provide rigidity for people to lean back against with gusto. I decide to go with a dovetail because it holds itself together without glue or screws. This makes it possivle for me to take it out and carve a design on it one day (when I learn how).

The problem with the pins of my dovetail (for those discerning craftsman reading) is it's weakness to the direction of the grain, even the strongest glue cannot help. I solved this by shooting a bunch of 21 gauge pins into the dovetail's pin for reinforcement. It's not traditional, but it should work. No one knows of this because it is hidden.

Tuesday, November 27, 2007

In My Tool Chest

Here’s a couple useful tools for the small work shop.

The $39 Kreg Pocket Hole Jig is incredibly fast way of joining wood. It is quick and efficient with no learning curve. The system is so well thought out that a novice can learn to make a stronger, more precise butt joint in no time. It actually makes wood working too easy and takes all the craftsmanship out of woodworking. The blue plastic jig is clamped to the wood, a step drill bit bores a hole at the precise depth and angle, an special screw is driven into the hole with the long #1 square drive bit. You can go to Kreg.com to check out their video on the product. The down side is the elliptical hole that is left, so I only use this on hidden parts of the project.

The $25 Cold Heat Freestyle cordless hot melt glue gun is a fun little toy that turned out to be very useful. I use it for quick household repair and as a strong wood working clamp. With a 30 seconds dry time, I found it useful in holding pieces wood together temporarily while I do dry assembly or hand planing small pieces of wood, it also hold templates to wood as well as keeping the wet stone in place while I sharpen my tools. The joy of this tool is that the there’s no wires to get in the way and the gun heats up in about minute or two, so you don't have to stop what you are doing when you are on a roll. The mini glue gun may be targeted for the hobby crafters to glue dried flowers to pine cones, but it proved it usefulness when we had to put up a new sign for the showroom. It was the quickest way hold the granite tiles and the acrylic letters in place while the construction adhesive cures. This little gun saved a day's worth of work since we were able to hang the letter without having to wait for the glue holding the tiles to dry, a dab on each corner is strong enough to hold up granite tiles.

Monday, November 26, 2007

Making My Bed

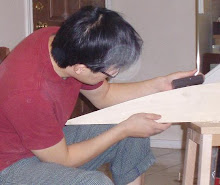
I spent Thanksgiving with two hundred dollars of wood, some free time a couple new tools I was ready to try out. The goal is a day bed that I drew out in two minutes for approval. I knew What the end result was, I just had no idea how I was going to get there. The details would be ironed out as I progress. This would only work if I think a few steps ahead of any cuts for bore.
I do know of some limitations, the bed would be made down stairs and had to be moved upstairs so I had to make this with knock down ability. The quickest way to make a decent knock down joint from my aresenal is with dowels and pocket screws joint. 3/8" dowels are placed between the mating wood edges and pocket screws pulls them together. I could make pinned mortise and tennon joinery but that would take much more time than I wanted and the mortise would severly weaken the thin legs since they will not be glued for the knock down purpose.
To prevent the bed from racking itself apart, the apron on the front is extra wide. The side has arms and the back has the head board, which keep the thing tight and square. Joining wide solid wood is a tricky thing to do becuse of the expansion nature of the wood, so I had to make the center dowels tight and the dowels at the end had elongate holes to allow for expansion. I betting that the pocket hole screws will flex a bit with the softer poplar wood so the apron should not split once the humid summers comes.
Slats on the bed are joined with dovetails so it would pull the bed together and can easily be removed. The middle slat is made of much stronger oak to bear the weight in case someone wants to stand on the middle of the mattress and exert all the pressure to the least supported piece. I wanted to make sure this bed can handle at least 400 lbs and the additional impact from anyone who want to jump on the bed.
This is the product from twelve hours of work, I will talk about making the headboard and method of making this later.

Sunday, October 21, 2007

Dust Control

When I do wood working in the living room, I have to minimize any power tool usage. That's why I prefer the hand saw and the chisels. But when there's lots of ply wood to cut for the cabinet carcass, then the circular saw will have to come out. I use the Festool plunge circular saw. You can go the the Festool link and see all their product. They charge a premium for their product but they are incredibly well engineered product. The saw has a 95% dust extraction capability, is designed to be very safe and accurate. I connect this saw to my Eletrolux vacuum cleaner with a HEPA filter. The two are linked by an auto switch which turns on the vacuum when the saw turned on and off 7 seconds after the saw is turned off. Festool also makes an incredible Dust extractor, but I can't afford that right now. To make it even safer, I also have a portable HEPA air cleaner in the room when I work and finally I modified the air return on the HVAC system to accept a larger quality air filter. This protects the central air system from any wood dust left.

Friday, October 19, 2007

The Cabinet Install Guy

It's comforting to know I can always make money to pay the bills if there's a need. While working as a Lowes' Kitchen designer, I was fortunate enough to meet some pretty nice installers who let me hang out with them to learn their side of the business. One guy in particular, whom every designers described as arrogant, taught me the most about kitchen installation. It turns out he couldn't understand why the other designers never bothered to learn the installation side of the business, he felt it would make them better designers. I took the lesson to heart, learned to build and install cabinets. That continues to pay off to this very day. The need arose one day and I was able to install this kitchen for a a client. It was a one man installation job, so it took me about four days to complete this considering I had never installed Ikea's cabinet before. The product is pretty good, the only bad thing is their independently contracted delivery service is pretty inefficient and damaged a few items. The store is 35 miles away, it slowed things down. I highly suggest a DIY pickup versus a cabinet delivery for those who wants install their own Ikea kitchen. The Ikea system is very well thought out, The core of their system is a BLUM, a German Hardware company that basically standardized the european 35 mm cabinet system. But more on that later. Granite was done by Panda Kitchens.

Tuesday, October 16, 2007

In My Toolchest

I realized that my air compressor was too big and noisy for the little amount of time I use it, so I traded it in for a new systems that works very well for the the little work shops. Lowes' came up up with this neat CO2 regulator that powers most pneumatic nailers. This tiny unit can shoot 600 16 gauge brads or 1200 pins. This is the same system that paint ball guns use, so refills and extra tanks are readily available. The kit cost $89 at Lowes and is worth every penny if you don't use the gun that often or if you do cabinet repair jobs. The refills are about $10 each, so it's quite affordable for a gizmo that turns all your nail guns cordless, is very quiet to use and takes up very little room. What's more important is that it there's no water vapor in the system so the nail gun lasts longer. The problem I do have with the unit is that if there is even al little leak anywhere along the line, then you can easily loose the entire canister of CO2 in a matter of minutes and then have to go get a refill. So I try to have a spare refill canister with me, after losing three tanks, I learned to work around these problems. A pretty good trade off to be able to use my 21 gauge pin nailer at night when that urge hits. Attached to the regulator is a EZ Fasten 21 gauge headless pinner. It's actually a generic no name tool from Taiwan and I got it on sale at Wood craft for $85. It shoots 1-3/8" 23 gauge pins which are the perfect size between the 18 gauge and the tiny 23 gauge micropins. This 21 gauge pins actually has enough holding power for by cabinetry needs and a decently small hard to see head.

Sunday, October 14, 2007

The Art of Making Space

There's valuable storage space under the staircase and I finally felt it was time to take advantage of it. I had cut away the sheet rock last week and spent the next seven days looking at it, trying to see what I can do to maximize the storage capacity, make it look great and pay as little as possible. Luckily I had saved 5 sets of Blum Tandem drawer glides from a previous cabinet job, this saved me $100. Today's cost was $25 for a sheet of cabinet grade birch plywood. The Depot got some shipped in from China. From what I understand at Panda Kitchen, the Chinese manufacturers import wood from Russia and Canada and then export the plywood to the U.S. The quality isn't bad considering I can get 3/4" plywood with two smooth side for this price. This sheet good is used for drawers and shelves, so the look is not as important. I would spend more money on the visible or primary wood, so you do get what you pay for. There's plenty of challenging obstacles to overcome from this project. The goal was to put shelves and drawers between the studs. The hard part was that the studs were crooked and out of plum, so mounting the drawer glides on the stud took a little more than trial and error. I could build a plywood box between the studs to make them square and plum for the glides, but that cost more money and makes the drawer even more narrow. So I opted for harder way because today, my time is free. So this is all I have to show after five hours of work. At this point, I have no idea how the unit would look like in the end. I might take ideas from the built in fridge I had made out of the pantry in the kitchen. Now, before you start shoving major appliances into the cavities of your house, understand how the unit works. The fit was tight, but I knew the compressor was at the bottom of my fridge and the fan pushes heat from the bottom of the unit. Another precaution I took was to leave a 30" x 6" gap behind the shelf over the Fridge to let the heat escape (heat rises). This is the reason why i never made doors over this unit. This would've been a failure if I this cabinet guy didn't know something about refrigeration. Now, back to the stair case, if I didn't know this was a load bearing wall, then this would also be a total failure. That's why I having so much design issue with this project and the studs will have to be integrated into the design. Actually, the design would have to be integrated into the studs.

Thursday, October 4, 2007

The Butt Joint

One aspect of woodworking is joining various size wood pieces together to create something of use. This is called joinery. A good woodworker knows many different joints since each ones has it's strength at different application. A profitable woodworker accomplishes this task with the quickest way possible without sacrificing strength or look of the piece. The most basic of all the joints is the butt joint. This is a joint that anyone can accomplish if they are given two planks of wood, nails and a hammer. Because of it's simplicity and relative weakness, it is a disrespected joint among the fine woodworker. With minor modification, I find it the most used way of joining wood in my work. We live in modern time and we should take advantage of modern convenience like gorilla glue and the microwave oven. I'm pretty sure craftsman way back then would've used the lowly butt joint if they had the highly prized nails back then. Nowadays, change the nails for confirmat screws or dowel, biscuit or the new domino, add the proper glue and you have a very strong joint if used in the right application, made in short time with high accuracy. I built this cabinet centerpiece for our display at Panda Kitchen. These butt joints are held together with brads and woodscrews only. There is a chance we would have to move the display, so no glue is used. The miters on the stacked crown molding are modified butt joints cut at exactly 45 degrees angle. Put enough of these together and you will have very nice looking piece of work. Butt joints well works on the carcass of the kitchen cabinetry that are assembled on site because they are permanently screwed to the walls shortly after assembly. The boxes are stationary and each joint is reinforced with an adjacent joint, so there are very little stress to a single joint. Glue a counter top on the entire assembly and it is a solid piece made of many small pieces. Butt joint allows us to install a kitchen quickly with minimum tools on site.

Tuesday, October 2, 2007

Work In Progress

All the tools I'll need to do a decent job of woodworking is in this picture. They are stored in this giant tool box I had frankensteined together. It's not a pretty visual, but in a two hundred square foot room, it's poetry. Sometimes, I feel I could work with a whole lot less tools, and other times, more would be nice. There are more an than tools in this cabinet, there are the not so glamorous accessories equally important in woodworking. These are assortments of sharpening stones, glue, screws, measuring, marking devices, jigs, clamps, wood finishes, waxes, applicators and reference books. The key to building efficiently is that you should be able to get to these things you quickly, so a loose organization system is very important. By loose, I mean I know where they are and that's pretty much it. I am by no means an organized person. I really don't believe in spending my time cleaning when I could use it to make a mess and build something. When doors to my tool box are closed, the cabinet looks like a bunch of mixed match boxes set on top of each other. As my wood working skills develop, this tool box will change to suit my needs. Right now it is unrefined and a little sloppy looking, but it's okay because it's a work in progress.

Sunday, September 30, 2007

The Dyanmics of Planning

I don't make detail plans because that would require a lot of time and experience. That two things I don't have enough of. That's why many amateur woodworkers buy project plans, all the unexpected problems are exposed by the designers, this makes the craft very predictable (boring).

Encountering the unexpected and solving problems as they arise is one of the joys of designing. I always feet I don't have enough experience to plan things to the finest detail, so following that inexperience to the end of the project just escalate any problems that WILL arise. So, I plan just enough to get started. The priority is not to waste money or wood, have a good function and proportion, but after that, I make things up as it the project progresses. This also gives me a chance to go into my scrap wood pile and make use of it somewhere in the project.

This is one of my first project, a cabinet loosely based on the traditional Japanese step tansu. I created the usual sketches and thought about how it would look for a while. While assembling the cabinet, I realized I had made a measurement error where the top was ¾ inch narrower than the bottom, resulting in a slight trapezoidal shape of the main box. I planned the project from one sheet of plywood, so there's not enough wood to remake the top. I decided to live with the mistake and trimmed the two doors to fit the now unsquare box. The surprising result was that the pair became self-closing doors because they tilt inward. By creating an equal reveal around the door, most people can't see the error. I then decided to short cut the project and put my tool box on top of the cabinet to get the step tansu look. It now sits next to my entry as a shoe cabinet and a place to put my keys and wallet upon entry to the home.

Saturday, September 29, 2007

The Economy of Wood

I have pieces of wood stashed all over the house. They are left overs from past project, off cuts of plywood panels, dimensional lumber and moldings, just big enough to keep for that one chance a future project would have a spot for it. They are stashed in the closets, in the laundry room, stacked on the floor of the living area. Some days, I would hit my threshold and throw them away. I just don't like to waste wood, after all, I'll find a use for them eventually, besides, what is a woodworker with out wood? With left over plywood from the book case job, I was able to make a make an art niche over the fireplace. That's why it is made of oak instead of the usual birch. With such a small place I had decided to start building things into the walls. Removing the mantel and redoing the fireplace added another 1% to the room's usable area. A rejected cabinet door frames the oil painting we bought at the street market in Hong Kong. I was careful to make sure the back of the art case has enough distance from the chimney vent since I burn scrap wood in the winter with this fireplace. Left over rubber tree wood from a discarded baker's rack gets a new life as the top of this built-in. It was not deep enough, so I jointed the back side and glued in a piece of pine reinforced with biscuits. You can't see it, especially with the tool chest blocking everything. The doors came from a kitchen I had designed. It was slightly warped as you can see and was rejected by the customer. I thought it look fine, but too small for the old linen cabinet space I had decided to re-do. The solution to using an undersized door is the over sized frame. To make it look well thought out, I extended the frame to the floor and cut out the legs. Now it has a good proportion and looks like it belongs there. The same customer rejected the glass doors because it has the discoloration. In the wood worker's world, it is sought after for the popping grain pattern. In a row of plain doors, one would see this as a defect. Placed this door by itself and the doors has characters. I extended the styles to the top and trimmed it off with a left over piece of basket weave molding from the kitchen job. An acquaintance gave me two pieces of padauk left over from her interior design class. After some thoughts, I found there were more than enough to make handles for the kitchen. With a draw knife, spoke shaves, some simple hand tools, and about 20 minutes each, I was able to make some pretty decent ones, my carving skills aren’t great, but you have to start from somewhere. Robertson head trim screw hold the two pieces to the cabinet doors. Proper placement of knobs on the doors is a personal thing, I like my handles to extend the horizontal line of the styles and rails of the door. I think it's more fun to resourcefully use left over pieces to make new ones, the boundaries and limitations of the pieces make it more challenging than having access to everything.

Friday, September 28, 2007

$3000 Kitchen Makeover

It cost $3,000 to renovate my kitchen. What I saved in money, I paid triple the amount in time. I don't have a table saw, so the 68 lap joints needed to make the doors took a week with my Japanese handsaw. I would take a couple weeks off from the project when hand cutting plywood panel became tedious. With proper planning, I was never with out a sink or stove for more than 24 hours. The kitchen still isn't done, I have some small details to take care of, but it's not important and I'll get to it when I'm in the mood.

Here are some cost saving features.

The back splash and the four square door panels are special order pre-finished maple flooring I got at the at the clearance pile at 75% off. The dishwasher and microwave are clearance store display. Saved $400 The two wooden shelves are scratch and damaged doors with tempered glass on top, glass came from a discontinue kitchen cabinets display, free.

Flooring is cork board tiles with stain and polyurethane glued to the slab with vinyl adhesive. 99 cents per tile, add labor and four coats of polyurethane.

The counter top is made of concrete with about $150 of material, add one week of laborious grinding and polishing.

The cabinets are made with ¾” birch plywood, cut and assembled in the living room. I didn't want to waste money but, I believe in building things that would last. so I spent the money in good plywood, at $42 per 4x8' sheet. It took six sheets to make the carcass and the shelves, careful planning minimizes waste. The doors and cabinet frames are poplar dimensional lumber, this mixes well with pine and birch color wise. As for workability, I recommend this wood to any beginner craftsman who favors hand tools, it cuts, planes and chisels easily, and still hold a decently sharp edge.

The handles are hand carved padauk and pine, made from scrap wood.

Doors are joined with half laps and gorilla glue. I routed a rabbet after the joint dried then silicon a ½ plywood panel. I made a similar door in the bathroom a year earlier and it still held together in the steamy bathroom environment. Each doors cost about $15 instead of $70. I may go back and put shaker details putting staggered pegs to each joints.

Front of Drawer boxes are hand cut dove tails, back are dowel, dry erase board panel make water resistant drawer bottoms.

Here are some features of a homemade kitchen

Cabinet sits on a cedar base, making it resistant to water damage.

Cork is soft on the feet, durable, does not promote fire, is self healing to cuts, is hypo allergenic. Canned goods has been noticed to bounce twice when dropped from the five foot level shelf.

Concrete counter top gets stronger with water, is distressed finish so it would look better as it shows wear and tear, the perfect match for the sink side of the kitchen.

Butcher block counter top on the other side does the same for the dry side of the kitchen. Oil splatters only feed the wood counter top and gives it a nice patina. Excellent for quickly chopping herbs for the last minute addition to a dish.

By fitting the 18 cubic ft. fridge, in the old pantry, I gained 9 more square feet of counter . and created a more efficient pantry. I figured we live don't need enough food to last the winter, so a large fridge and pantry is excessive.

Finally a place for the dogs’ food bowls.

Tilt out rice and grain bin.

Pull out pantry unit next to range for sauces.

Tea and packaged spices and food organization.

One cubic foot holds 10 bottles of wine and sauces.

Counter top on book case reaches over and ties the fridge to the kitchen.

Lattice work on sink base keeps the condensation under the sink from getting clammy and moldy.

Exposed side of wall cabinet turned into cork board.

Freezer door is now a chalk board.

Wednesday, September 26, 2007

Table for Two

My wife and I came to Texas with whatever fit in our two cars. We needed a table. I knew was going to build a table, I didn’t care that I didn’t know how. Soon, I was learning how to create the glossy finish for the table by reading the label on the back of a polyurethane can. Eventually I built my kitchen cabinets. There’s plenty of information out there about woodworking, taking a class is just one of them. Woodworking has been around for thousands of years. The trees hardly changed. There are only so many ways to join two pieces of wood together. Learn and master the few essentials and you can build anything you need. The “wants” takes more effort, time and resources. I may or may not get there one day, but this little table is how it all started. You can build this coffee table with the list below.

Materials.

(Qty 1) 24x48x ¾ cabinet grade plywood, I used birch with wild grain

(Qty 2) 2x4x8 pine stud, the highest quality and straightest piece

(Qty 1) packet of ¼” dowels

(Qty 2) ¾” x 8 ft. screen mould

(Qty 4) pre-made tapered pine furniture legs

Tools

Drill/ driver

¼” drill bit

Wood glue

Finish nails

Hammer

Larger nail as nail set.

Crosscut saw

Hobby saw and miter box

Oil borne polyurethane

brush

220-grit sandpaper

I’m not going to tell you how to do it, since it’s really not my goal to do step by step instruction on this blog. There are so little materials here, you are either going to end up with this table or a trough to feed a pony. The main idea to get hands on experience. Sure, I didn’t understand the idea of wood movement, classical proportion, a ripsaw from a crosscut then, but this project got me to the point where I understand it now.

Monday, September 24, 2007

No Longer an Amateur

I had a budget of $800 to build this pair of book cases that flanks the fire place for a client. It was a remodler who had too little time and too much to do. I figured I had about two days to work on this project before I'm in the minimum wage category.

With the proceeds, I bought a Festool plunge cut circular saw which did short work of cutting the shelves to size once it was at the work site. This German made circular saw rides on an aluminum guide rail and cuts perfectly straight line every time. It lets one person rip and 8' long panel and takes up very little room in the hatchback, so I didn't even need a table saw, that's good because I don't have one. The Rockler 32 mm shelving jig made fast and accurate work of drilling the eight rows of shelving holes. This allows the home owner to adjust the shelves' height to display art.

Roll of tape became the radius of the curves on the shelves. This complements the curves on the existing mantle and made the bookshelves look less bulky. I cut the first one, with my handsaw and used the spoke shave to smooth it out. (I don't have a jig saw). This became the first shelf and the template for the other five shelves. Careful planning, left me with just a little waste in materials. A 21 gauge pin nailer attached the template to the next shelf securing it for the router with the flush cut bit. Pin nailing the template to the work is secure, fast and the resulting holes are undetectable when the project properly finished. I don’t have much time, so I stained all the pieces with Minwax stain, set them in a secure place and let it dry for a couple days. On the last day I put put two coats of wax on all the parts. Flat pieces of wood are easier to buff then having to wax the book case installed. The owners were just going to put books and art on it, so a super durable finish was not needed and wax was a safe and easy protection to apply in a dusty remodel site. As you can see, I buffed it to a shine. Then it's carefully assembled on the stone veneer base with screws and liquid nail. The crown molding was added last and cut on site since it needed to be scribed into the stones of the fireplace. That took a compass and a coping saw and an understanding of compound scribing along two axis.

Now, it's not the prettiest nor the best built book case, I think the proportion could have been better, but given the time constraint, the limited budget and the fact that there's no other people who could do it this fast for this cheap, it's the perfect bookcase. What's more important is that the homeowners likes them and they will last until the next remodel.

Sunday, September 23, 2007

Table for More

It took me about 20 hours to make this dining table. Pinned mortises and hunched tenons attach the long apron to the legs, glue and 3/8” diameter dowels hold the shorter aprons and the legs together. The legs may look thin and fragile, but it’s strong enough to hold the very dense solid core flush door I bought at Home Depot as a top. I was lucky enough to find a nice looking grain pattern after only going through three doors. At about 100 lbs each, I couldn’t have inspected many more doors in that stack. I was also careful to go through the stacks of 2x2 oaks and found four 36” pieces that had quarter sawn cuts. Dig long enough at this big box store and you'll find some treasures like the quarter sawn oak I used for the apron. That’s the fun of making my own furniture, you get to choose your wood.

The 1 ¾” thick door gets a 1 ½” thick oak edge treatment, which thins it down a bit, but still too thick for the tapered legs I had made. I had wagered that using a luan solid core door would save me over 6 hours worth of work to make a perfectly flat table top as well as $100 extra dollars. One hour with a jackplane produces a 3/8” bottom bevel on the oak edge. This makes the awkwardly thick top look thinner. Look carefully at the legs and you’ll notice the grain runs along with the taper of the legs, half an hour of visually inspecting all 32 sides to cut the 8 tapers was worth the time. Even though the table looks simple and plain, there are plenty of attentions to detail here.

At 37-1/2" x 61-1/2" x 30" tall the custom table fits the scale of the room nicely as well.The walnut finished dining table goes perfectly with the mismatched collection of seatings I already have.